Easier VPN Setup with Ubuntu 8.10

Quite a while ago I’ve posted a way to setup your VPN access using VPNC in Ubuntu 8.04 Hardy Heron. Now with Ubuntu 8.10 Interprid Ibex, things will become much more easier, by using the NetworkManager applet in Gnome.

When you have not yet installed any VPN manager, the “Add” button for VPN connections in the applet seems to be disabled. But thanks to a post in UbuntuForum here, I manage to enable the “Add” VPN connection button, and add my office’s VPN connection by a few simple clicks.

1. Go to Applications -> Add/Remove.

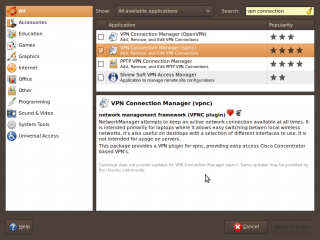
2. From the Show dropdown “All available applications”, and then enter “vpn connection” into the search box.

3. Choose your choice of VPN manager. In my case it’s VPNC.

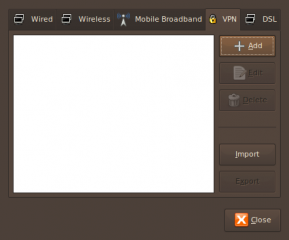
4. Now you can add the VPN connection. The “Add” button is enabled now. Click on the NetworkManager applet -> VPN Connections -> Configure VPN…

5. Click on the VPN tab, click “Add” button

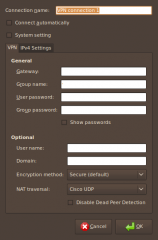
6. Enter your VPN connection details (Gateway, user name, passwords, etc).

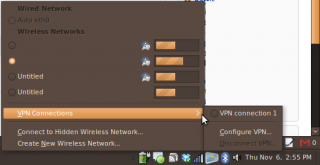
7. Click “OK”, and Voila!, your VPN connection is available for you at your NetworkManager applet, shown below:

Enjoy.
Ubuntu 8.10 on Dell XPS M1530

Following my previous post, finally I got the new Ubuntu 8.10 Intrepid Ibex on my Dell XPS M1530 laptop. The verdict: Pure Awesomeness. The installation is very quick and simple (it just that it took me a while to write this post). Almost everything works out of the box. The driver support is better. The OS itself I feel more stable, hard as a rock. And of course, more features. Sure, there is a few bumps, but nothing too serious.


(Above: My shiny brand new desktop 🙂 )
Continue reading

Upgrading to Ubuntu 8.10

The long awaited Ubuntu 8.10 has been released! I’m upgrading it from my Hardy 8.04 to this new version Intrepid Ibex, 8.10, as I’m writing this post. I’m using the Network Upgrade for Ubuntu Desktops. The method is fairly easy, provided by the Ubuntu website.

1. Start System/Administration/Software Sources.

2. Click on the “Updates” tab and change “Show new distribution release” to “Normal releases”.

3. Start System/Administration/Update Manager.

4. Click the Check button to check for new updates.

5. If there are any updates to install, use the Install Updates button to install them, and press Check again after that is complete.

6. A message will appear informing you of the availability of the new release.

7. Click Upgrade.

8. Follow the on-screen instructions.

I will give a simple review about the new Ubuntu Intrepid Ibex, 8.10 when I’m done upgrading it on my machine. Looking good so far 🙂

GrNotify: Your Google Reader Feeds Notification

I’m addicted to my rss feeds. I go over the feeds for tech news, current affairs, friends blogs, and many more. However, I don’t want to go to www.google.com/reader each time want to find out what’s new. This is where desktop applications that provides Google Reader notifications comes in.

For Windows: We have Google Reader Notifier for Windows.

For Mac: There’s a desktop application by the same name, for Mac users.

Firefox Extension: There’s even a extension for it.

But what about Linux users?

Enter GrNotify

GrNotify is a simple Python written tray application that will allow you to know when there are new items in the Google Reader.

Here’s a screenshot:

GrNotify Screenshot
GrNotify Screenshot

Continue reading

Cleaning up your Ubuntu Filesystem using FSlint

FSlint is a utility to find and clean various forms of unwanted/junk/lint files on your Ubuntu filesystem. For example, one form of unwanted files it finds is duplicate files, bad names, temporary files, files with bad symlinks, empty directory, and others.

To install:
sudo apt-get install fslint

Using Fslint:
If you want to open goto Applications—>System Tools—>FSlint

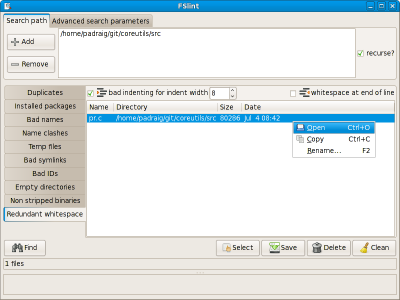
Screenshot: