I’ve been using VPNC in my Ubuntu to access my company’s VPN from https://getmoreprivacy.com/ for quite some time now. The story is, I’ve tried using Cisco VPN, but it will only get me as far as connecting to the VPN server. When I’m trying to access the company’s intranet, I’ll get a “page not found” error slapped to my face. I’ve found out it has to do with my machine’s Firestarter. I doesn’t really feel comfortable removing or stopping my Firestarter, so I have to find out ways to access VPN, and still having my Firestarter active.
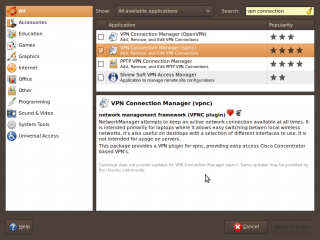
After doing some googling, I stumbled upon VPNC, alternate VPN client for Cisco servers.
Installing VPNC:
1. Enter the following in the terminal to install VPNC on your computer:
sudo apt-get install vpnc resolvconf
2. Create a <filename>.conf file in /etc/vpnc/ . Enter following command to create myoffice.conf:
sudo gedit /etc/vpnc/myoffice.conf
3. Copy the following text to that myoffice.conf file:
IPSec gateway <server IP address>

IPSec ID <group name>

IPSec secret <group password>

Xauth username <username>
You can get the values for <server IP address>, <group name> and <group password> by opening your Cisco VPN client .pcf file. For <group password>, the value is encrypted. What you have to do is, copy all the characters from the “enc_GroupPwd” value, go to this cisco vpnclient password decoder site, paste the characters and click “Decode”. It will give you the decrypted group password. Now, copy the decrypted password and replace it with the <group password> in your myoffice.conf. Replace your user name to <username>. Save the file and close.
Running VPNC:
You can run VPNC simply by running this command:
sudo vpnc myoffice /etc/vpnc/myoffice.conf
Enter your VPN password once connected. To disconnect:
sudo vpnc-disconnect
Making it work with Firestarter:
You might have a problem accessing for company’s intranet if you have Firestarter installed. Instructions below will make it work.
1. Edit /etc/firestarter/user-pre . First, make the file writable:
sudo chmod 600 /etc/firestarter/user-pre
2. Edit the file:
sudo gedit /etc/firestarter/user-pre
3. Copy the following to the file:
iptables -A INPUT -j ACCEPT -s xxx.xxx.xx.xxx -p esp

iptables -A INPUT -j ACCEPT -s xxx.xxx.xx.xxx -p udp -m multiport --sports isakmp,10000

iptables -A INPUT -j ACCEPT -i tun+

iptables -A OUTPUT -j ACCEPT -d xxx.xxx.xx.xxx -p esp

iptables -A OUTPUT -j ACCEPT -d xxx.xxx.xx.xxx -p udp -m multiport --dports isakmp,10000

iptables -A OUTPUT -j ACCEPT -o tun+
Replace your VPN server’s IP address to the xxx.xxx.xx.xxx.
4. Save the file and close.
5. Change the user-pre file permission back to the way it was:
sudo chmod 440 /etc/firestarter/user-pre
6. Restart Firestarter:
sudo /etc/init.d/firestarter restart
Thanks to Arun for the tips.


